¶ Enhanced Guide for Linear Motor Calibration on the Magneto X
Calibrating the linear motor of your Magneto X is crucial for achieving the best print quality as magnetic field may shift from our factory to your print environment. This guide provides a detailed walkthrough for calibrating the linear motor, particularly focusing on the Y-axis as an example for works for X-axis. Note that this is an optional advanced procedure and no need to run if you are already happy with the print results. It is recommended only after consulting with Peopoly support.
¶ Correction Steps
Important:
Before starting, ensure the printer is turned on. There is no need to unload filament for this process.
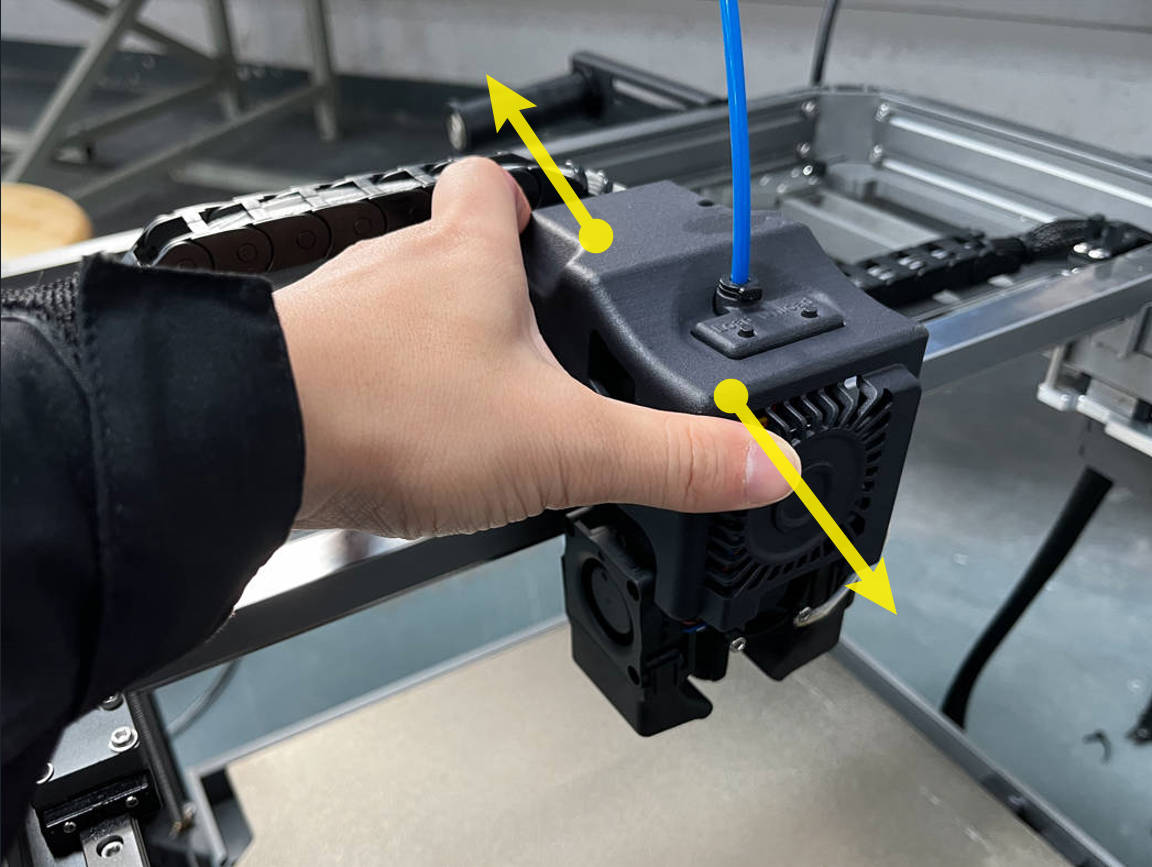
¶ Step 1: Position the Toolhead
Centering: Manually move the toolhead on the Y-axis to the center of the rail. This ensures an even calibration across the entire length.
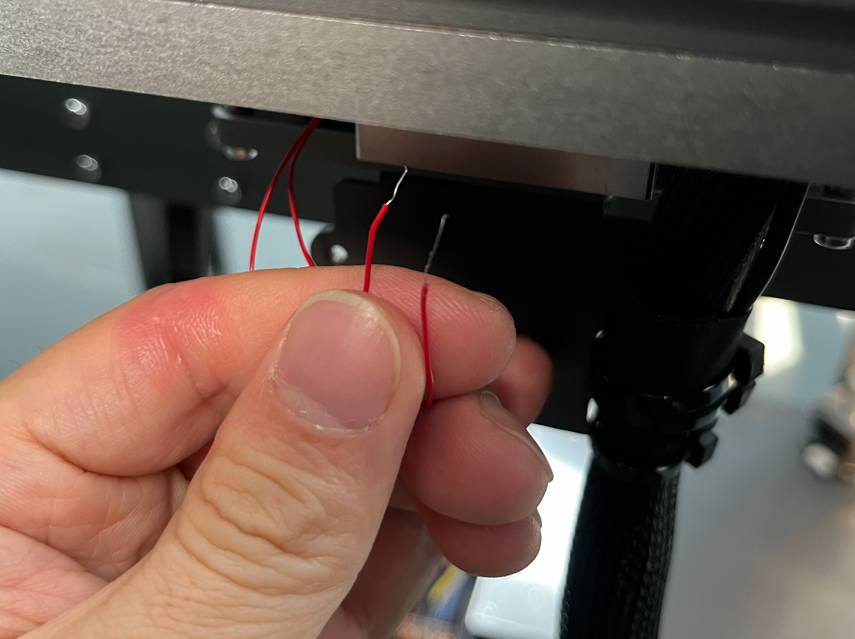
¶ Step 2: Locate the Red Wires
Y-axis Drag Line: At the printer's rear, identify the Y-axis drag line fixing plate.
Wire Identification: Locate the two red Y-axis encoder correction wires. They are crucial for the calibration process.
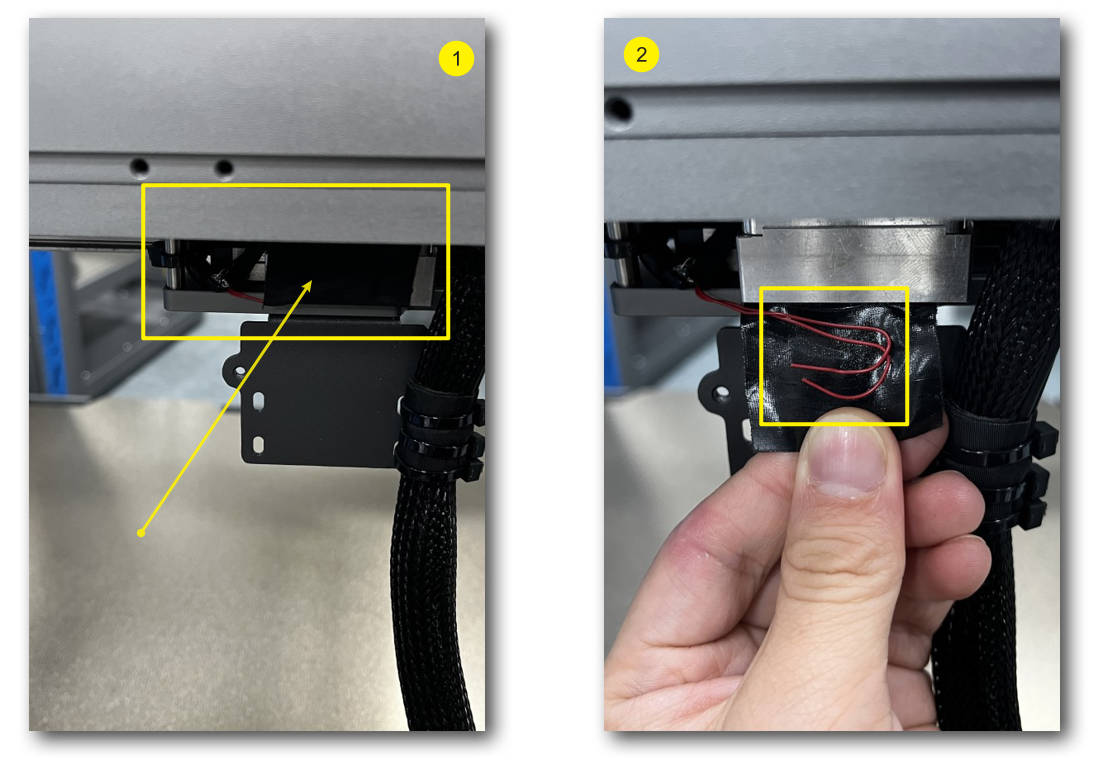
¶ Step 3: Access the Wires
Remove Black Steps: Check and carefully remove the part labeled 'black steps' to access the two red wires.
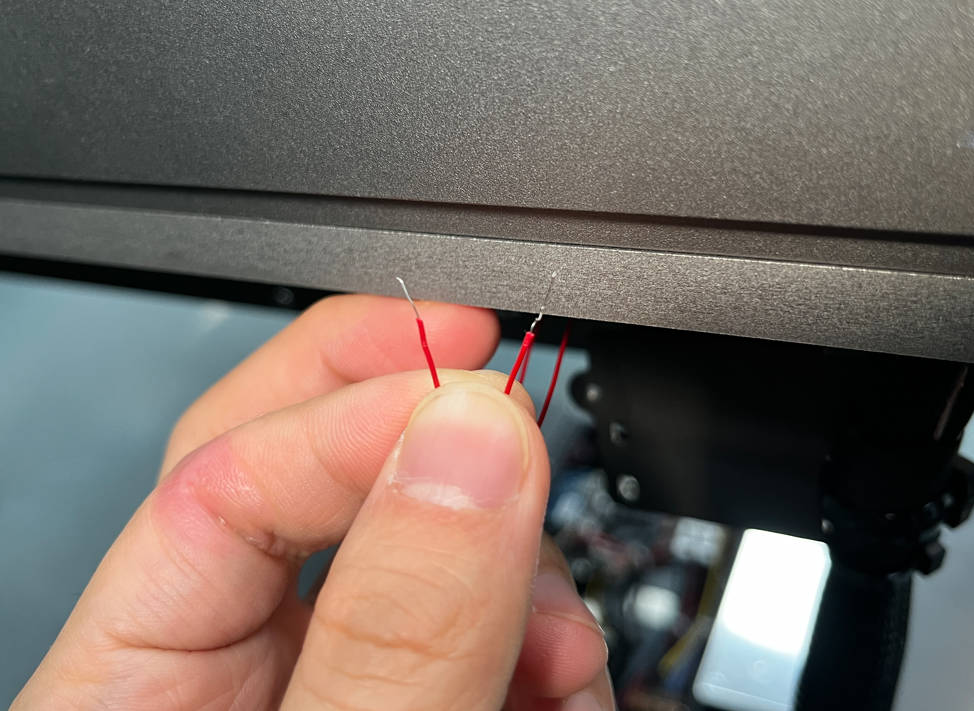
¶ Step 4: Prepare the Wires
Stripping: Strip about 1cm of the outer sheath of the red wires to expose the conductive material. Be careful not to damage the internal wires.
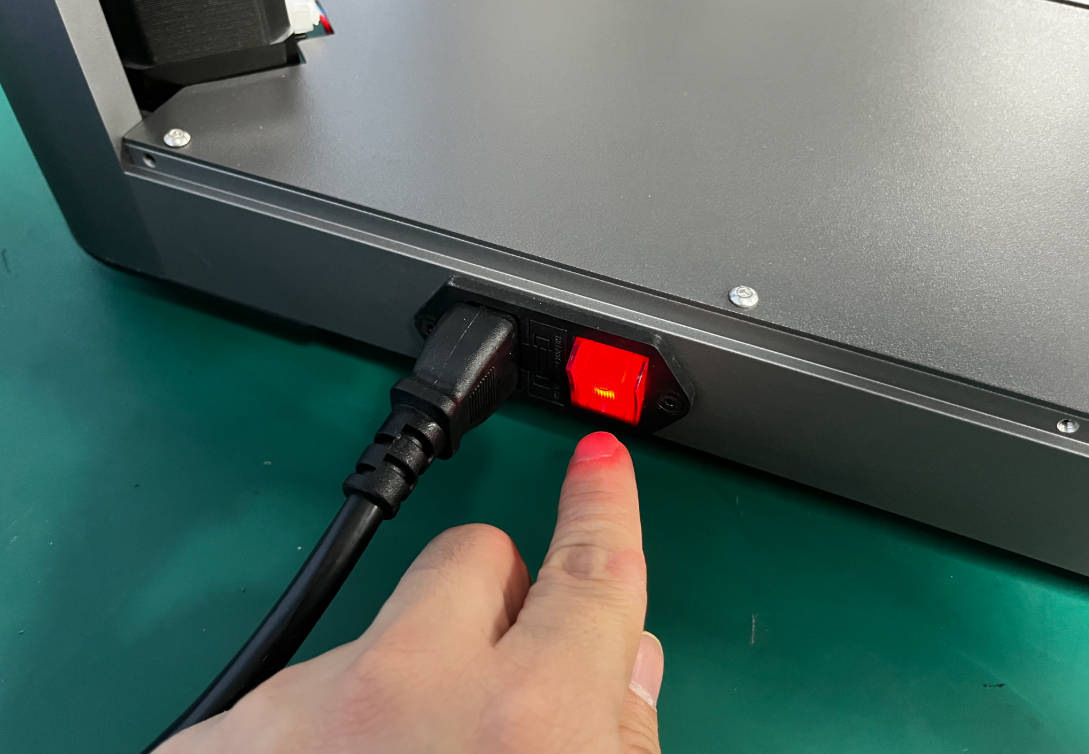
¶ Step 5: Power On the Printer
Activation: Turn on the printer and wait for it to initialize fully.
¶ Step 6: Enable Calibration
Crossing Wires: Carefully cross the exposed parts of the two red wires. This step enables the calibration mode. Ensure a stable connection.
¶ Step 7: Perform Calibration
Motion: Begin moving the toolhead from one end of the Y-axis to the other. Vary the speed between 50mm/s to 400mm/s. The system will collect data during these movements.
Repetition: Move the toolhead back and forth 20 times to ensure comprehensive data collection.
Watch the accompanying video for a demonstration of speed and movement:
https://youtu.be/0vVhukryqfk
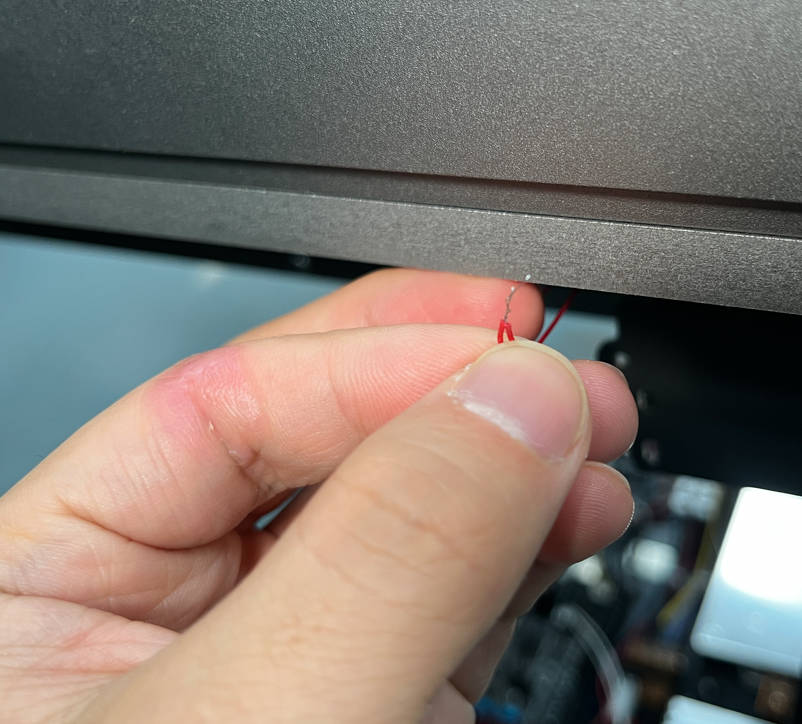
¶ Step 8: Conclude Calibration
Uncross Wires: After completing the movements, uncross the red wires and return them to their original storage location. This step is vital for potentially repeating the calibration if necessary.
¶ Step 9: Run Test Prints
Benchy Model: Use the provided benchy model for a test print. You may choose any filament for this test.
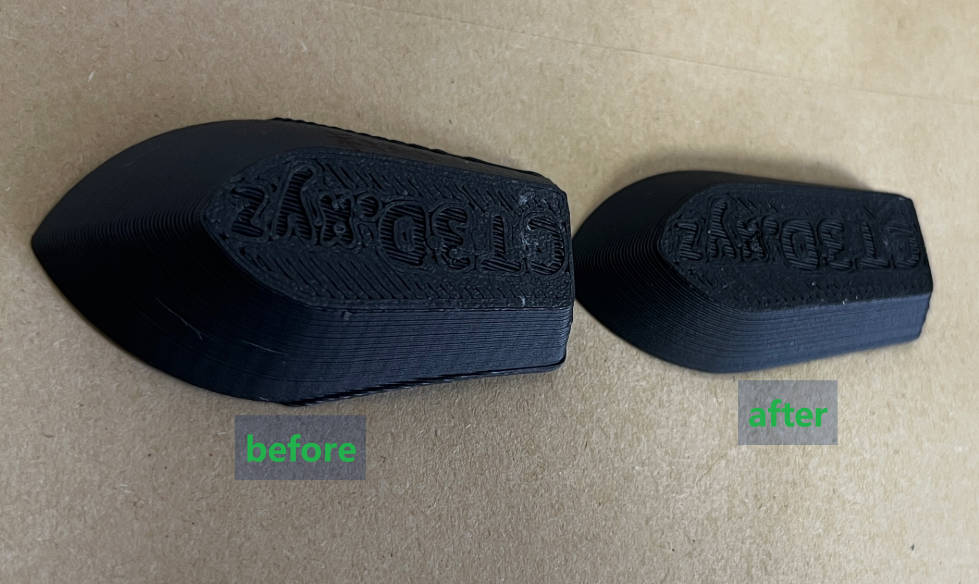
¶ Step 10: Assess and Repeat if Necessary
Surface Examination: Examine the surface of the benchy model for any banding.
Further Calibration: If unsatisfied with the results, repeat the calibration sweep step.