Replacing the Magneto X's meltzone, a crucial part of the printer's heating and nozzle system, demands precision and attention. Follow this refined guide for an effective replacement process.
¶ 1. Important Precautions
Safety First: Ensure the printer is turned off and unplugged before beginning. Avoid Damage: Never place any parts on the magnetic rail.
Tools You Will Need:
- Pink Hex Allen Key (2.0mm): For smaller screws.
- Green Hex Allen Key (2.5mm): For larger screws

Illustrated Guide: Reference Diagram: Start with a diagram of the toolhead to identify components you'll interact with.


¶ 2. Steps
¶ 2.1 Lower the Bed
Space Creation: Lower the bed by approximately 15cm via Klipperscreen manual controls to create enough working space.
Homing All --->Action--->Move--->Z+

¶ 2.2 Remove Filament
Filament Removal: Take out any filament in the toolhead but leave the feeding tube intact.
Heat nozzle to 200 degrees Celsius:

Unload the filament:

After removing the filament, unplug the Magneto X from all power sources.
After removing Filament, all subsequent operations must be performed without power!
¶ 2.3 Remove the ToolHead Housing
Exposure: Remove the housing for internal component access. Take care to note how it fits for reassembly.

¶ 2.4 Remove Extruder Screws
Unfastening: Use the green hex key to remove two screws on each side of the extruder and store them safely. The screws are highlighted below and you can see it clearly when looking down from the top of the toolhead.

¶ 2.5 Disconnect Extruder Cables
Detachment: Gently disconnect the extruder cables by pulling from the connectors

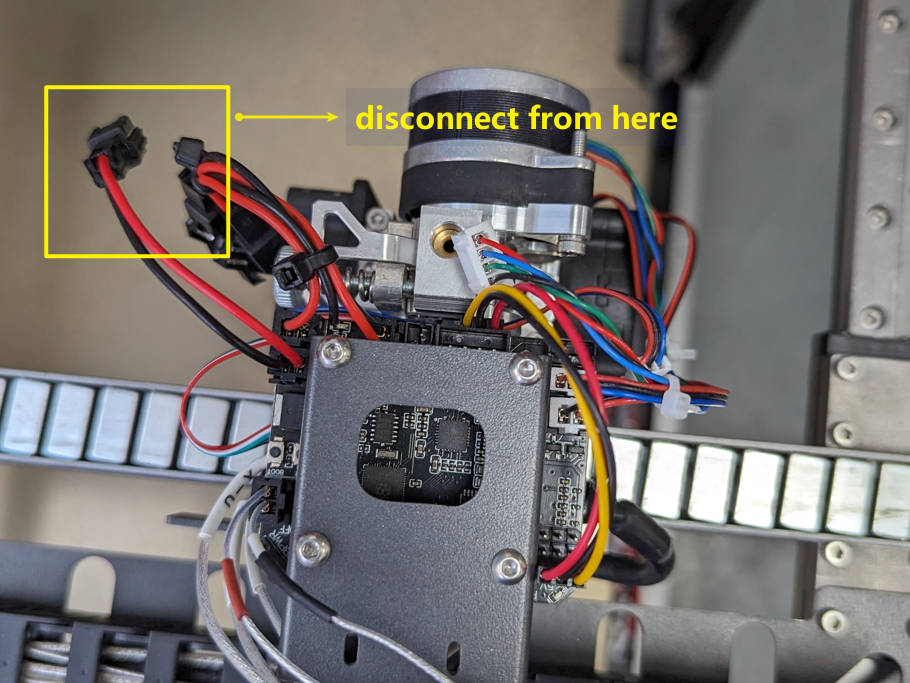
¶ 2.6 Disconnect Meltzone Cables
Heater and Sensor Removal: Disconnect cables from the heater and temperature sensor, noting their positions
Best to remove from the cable joiner, not at the socket
¶ 2.7 Remove the Extruder
Extraction: Lift and remove the extruder unit, placing it in a safe, non-magnetic area
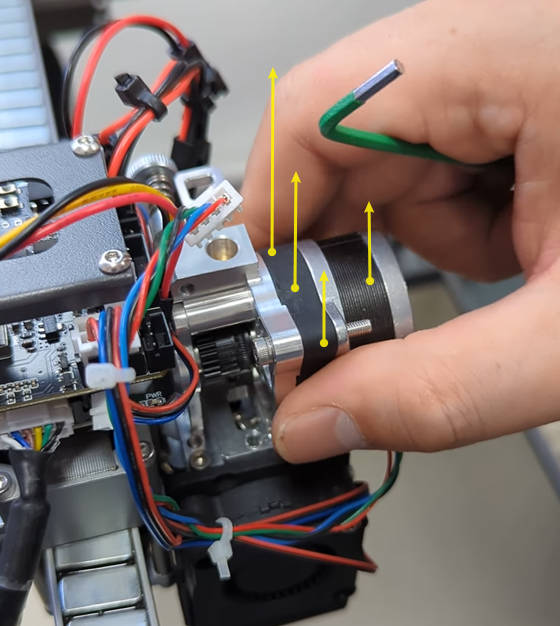

(Video) https://youtube.com/shorts/-DZy4x5jUNU
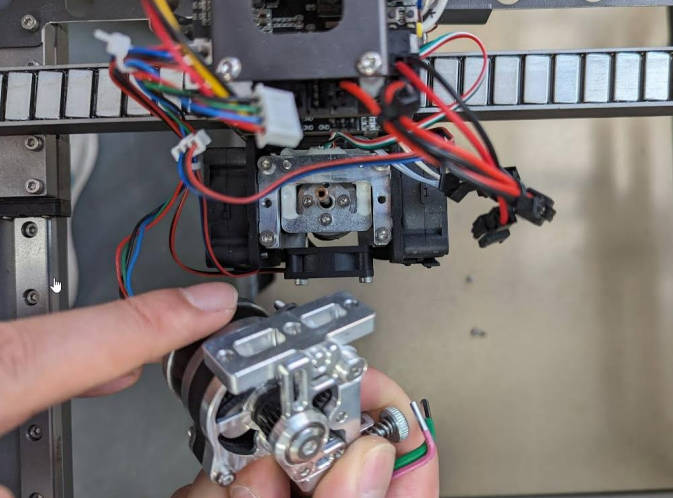
Make sure the extruder cable is disconnected and you can place it safely on the build plate
¶ 2.8 Remove Three Screws
Dismantling Meltzone: Remove the three screws securing the meltzone and heatsink using the pink hex key

¶ 2.9 Remove the Meltzone
Ejection: Push the meltzone out from the back, assisting with a gentle pull from the bottom.
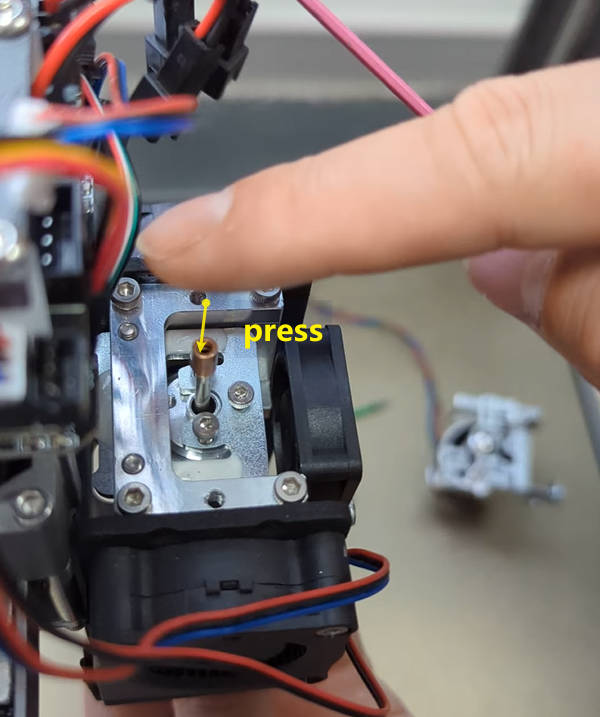
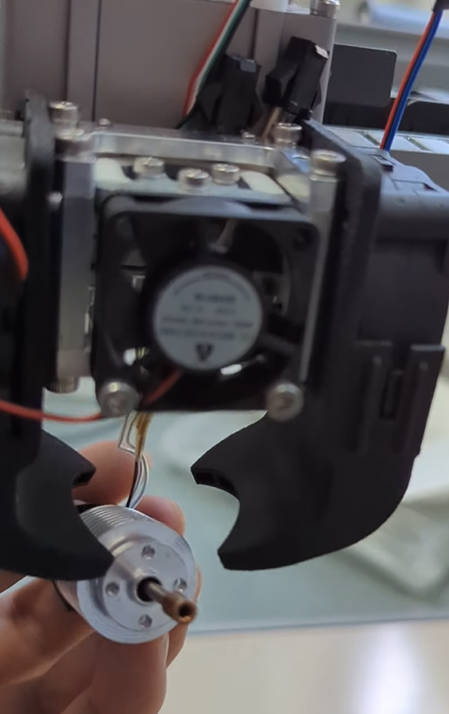
(video) https://youtu.be/NHhuzltCoVM
¶ 2.10 Prepare Replacement Meltzone
Selection: Choose a replacement meltzone of the correct length, noting that different lengths may require fan duct adjustments.
Make sure you position the two cables on the meltzone on the right side for it is easier to route them for connection when installing meltzone. The Nylon one (with creamy white cable) is the sensor cable and the other one is heater cable
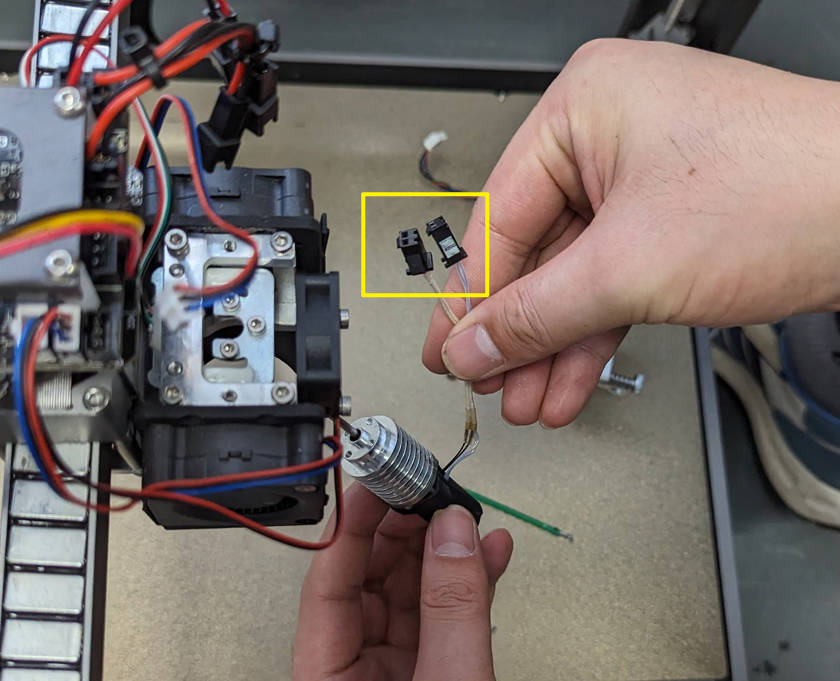
¶ 2.11 Insert the New Meltzone
Insertion: Carefully push the new meltzone back in place, ensuring correct seating and alignment. Make sure you still have easy access to both sensor and heater cable

Rout the sensor and heater cable on the right side around the front fan.
¶ 2.12 Reconnect Heater/Sensor Cables
Reconnection: Securely reconnect the heater and sensor cables, routing them to avoid obstruction
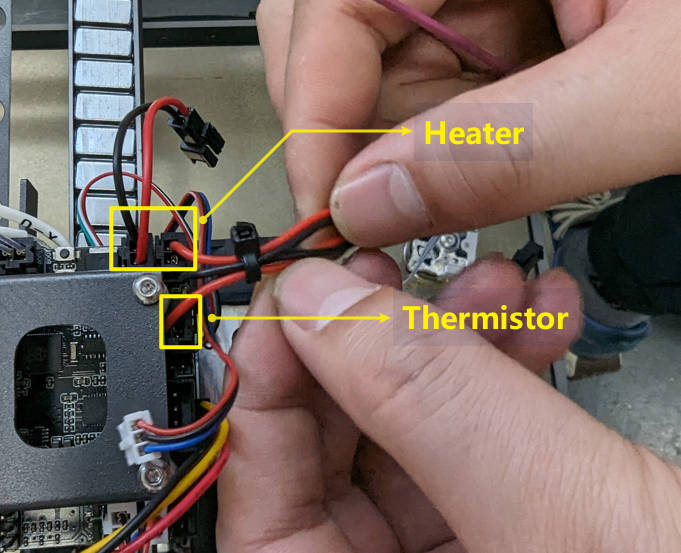
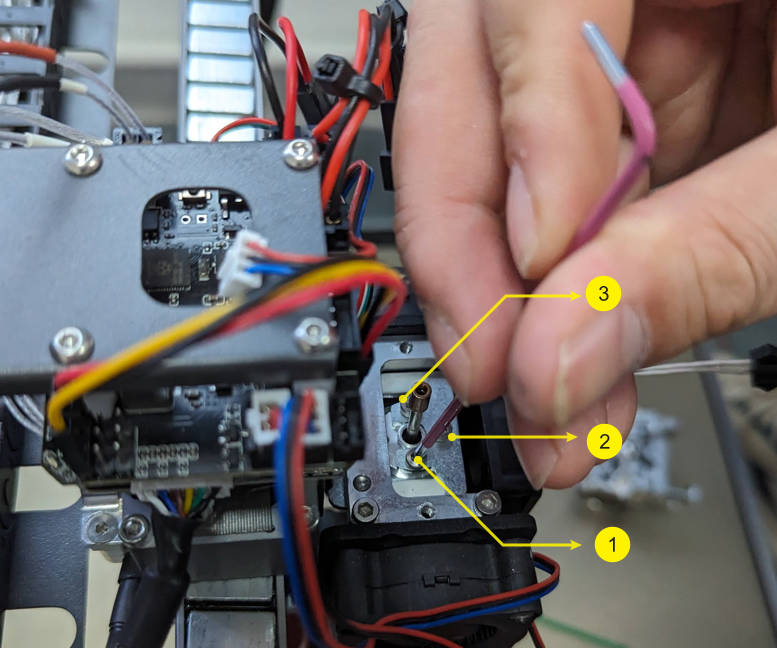
If you are installing long meltzone, please refer to this picture to reconnect the connector to the board:
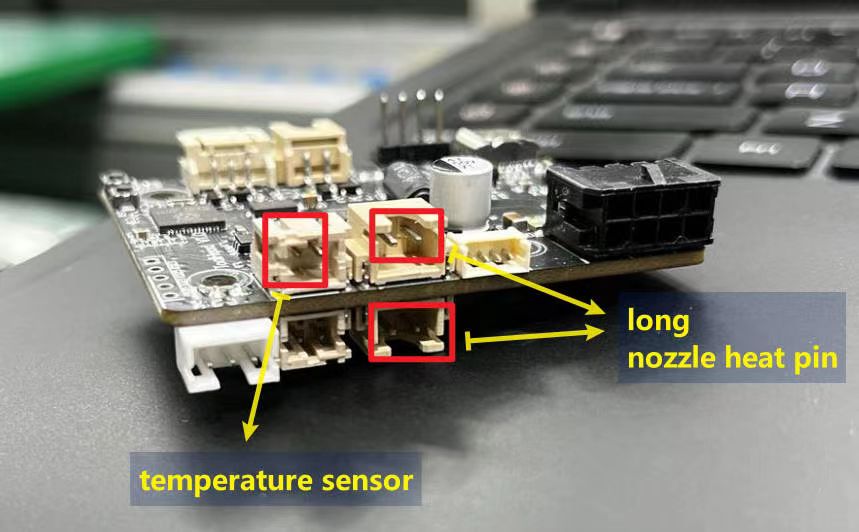
¶ 2.13 Secure with Three Screws
Securing: Reinstall and tighten the three screws to secure the new meltzone without over-torquing.
The long molten pool has three wires, two of which are the wires of the long molten pool heating ring, and one wire is the wire of the thermistor. Judge by the following method:
- Smaller connector x1 temperature sensor
- Larger connector x2 long nozzle heat pin
¶ 2.14 Reconnect Extruder Cable
Reestablishing Connection: Reconnect the extruder cable, ensuring a firm and accurate connection.

¶ 2.15 Reinstall the Extruder
Positioning: Align and place the extruder back, matching the screw holes to the mounting points.
¶ 2.16 Secure Extruder with Screws
Fastening: Reinstall the screws on both sides of the extruder for a secure attachment
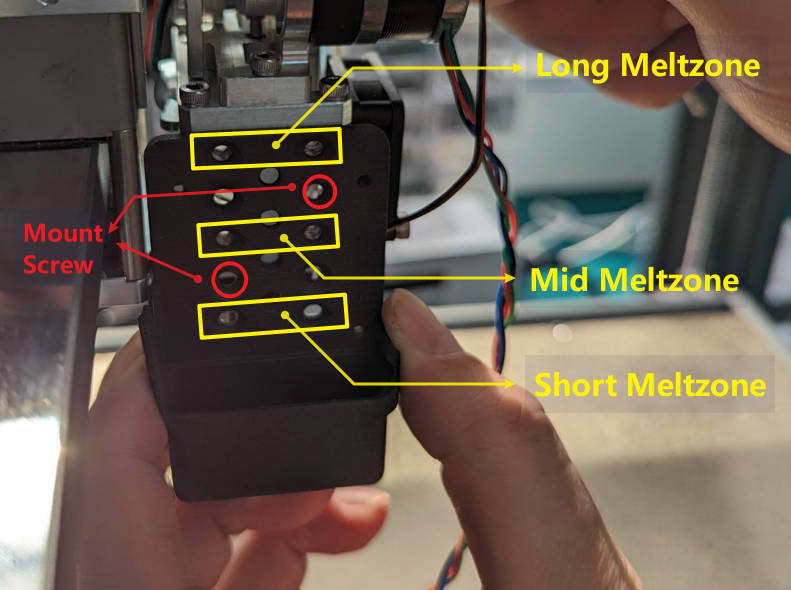
¶ 2.17 Adjust Fan Mount
Cooling Optimization: Adjust the fan mount according to the new meltzone's length. There are three positions for optimal cooling, align center holes until mount screw locations line up with desired yellow meltzones in diagram.
¶ 2.18 Reinstall Toolhead Housing
Final Assembly: Reattach the housing, ensuring all components are secure. Final Precautions
Handle with Care: Gently deal with all components to prevent damage. Post-Reassembly Testing: Conduct a test print to ensure functionality. Patience is Key: Take your time for a successful meltzone replacement, enhancing your Magneto X's print quality and reliability