¶ Enhanced Guide for Linear Motor Calibration on the Magneto X
Calibrating the linear motor of your Magneto X is crucial for achieving the best print quality as magnetic field may shift from our factory to your print environment. This guide provides a detailed walkthrough for calibrating the linear motor, particularly focusing on the Y-axis as an example for works for X-axis. Note that this is an optional advanced procedure and no need to run if you are already happy with the print results. It is recommended only after consulting with Peopoly support.
¶ 1. Preparation
Important:
Before starting, ensure the printer is turned on. There is no need to unload filament for this process.
Before starting correction, please perform the following operations:
- Power off the machine.
- Manually move the extruder to the center of the printing area.

¶ 2. Steps for Y-axis Linear Motor Calibration
¶ 2.1 remove the four screws and one zip tie
We need to remove the four screws and one zip tie indicated in the picture below:

After removal, you will see the DIP switch as shown in the picture:

When the DIP switch is in the ON position, it indicates normal operating mode. When in the OFF position, it indicates calibration mode.
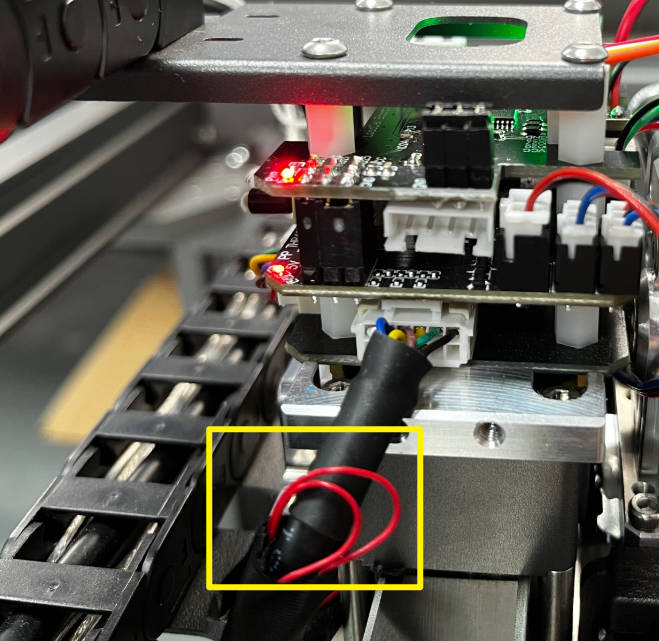
If you do not see the dip switch on your machine, but see two red wires. please refer to this wiki to correct it.

¶ 2.2 Power up the printer and disable motor
After the system completes booting, press the motor disable button to disable the motor:

¶ 2.3 Switch Y linear motor to calibrate mode
After disabled the X/T axis motors, set the DIP switch to the OFF position:

Now the Y-axis motor is in calibration mode.
¶ 2.4 Perform Calibration
Begin moving the toolhead from one end of the Y-axis to the other. Vary the speed between 50mm/s to 400mm/s. The system will collect data during these movements.

For reference on movement speed, please see this video: https://youtu.be/0vVhukryqfk
After moving it 20 times, set the DIP switch to the ON position.
¶ 2.5 Restart the printer
Finally,power off and restart the printer to complete one cycle of Y-axis linear motor calibration.
¶ 3. Steps for X-axis Linear Motor Calibration
The location of the X-axis calibration switch is shown in the picture below:

Another view of the X-axis DIP switch:

To calibrate the X-axis, there is no need to remove any screws. Locate the calibration switch, and then follow the same steps as for the Y-axis calibration.
¶ 4. Run Test Prints
Benchy Model: Use the provided benchy model for a test print. You may choose any filament for this test.

¶ 5. Assess and Repeat if Necessary
Surface Examination: Examine the surface of the benchy model for any banding.
Further Calibration: If unsatisfied with the results, repeat the calibration sweep step.