¶ How to slice and transfer file to Magneto X
This document introduces the use of OrcaSlicer to quickly slice and send files to Orcaslicer via wifi.
If you haven't downloaded OrcaSlicer yet, please refer to this link to get OrcaSlicer
Main Steps:
- Add Magneto X to OrcaSlicer's machine list
- Choose Filament profiles and slice it
- Transfer file to Magneto
¶ 1. Add Magneto X to OrcaSlicer
Open Orca Slicer, click Prepare, click the drop-down box below Printer, and click "Add/Remove printers".

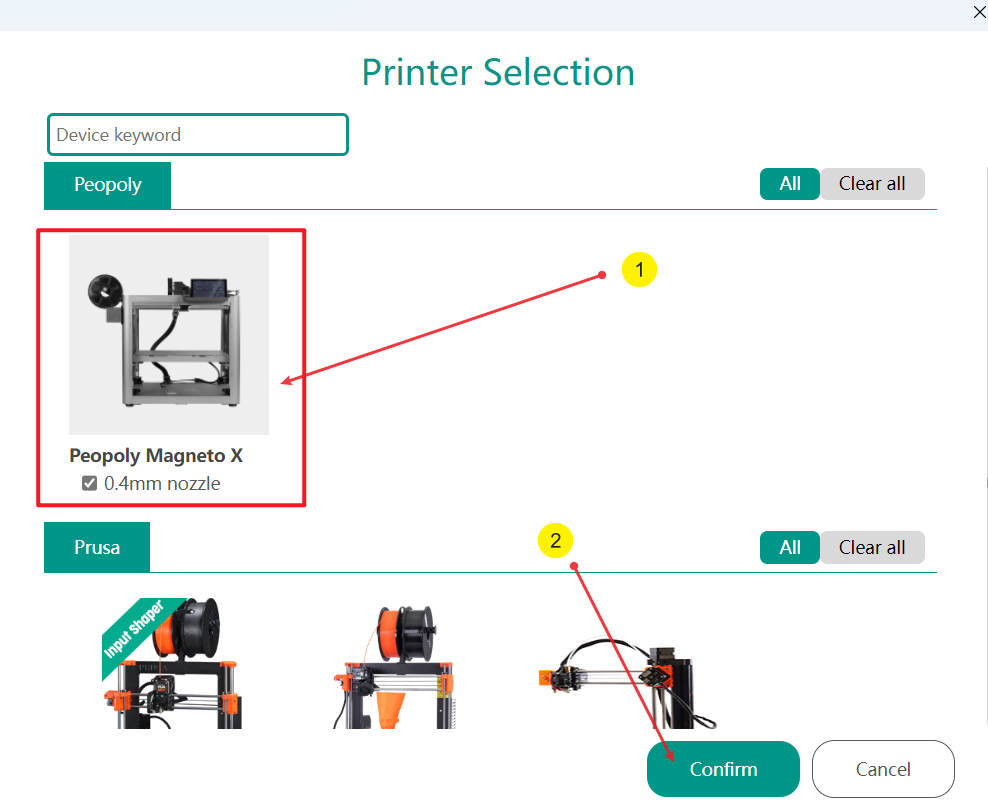
After clicking, the following dialog box will pop up. Select the Magneto X machine as shown below.
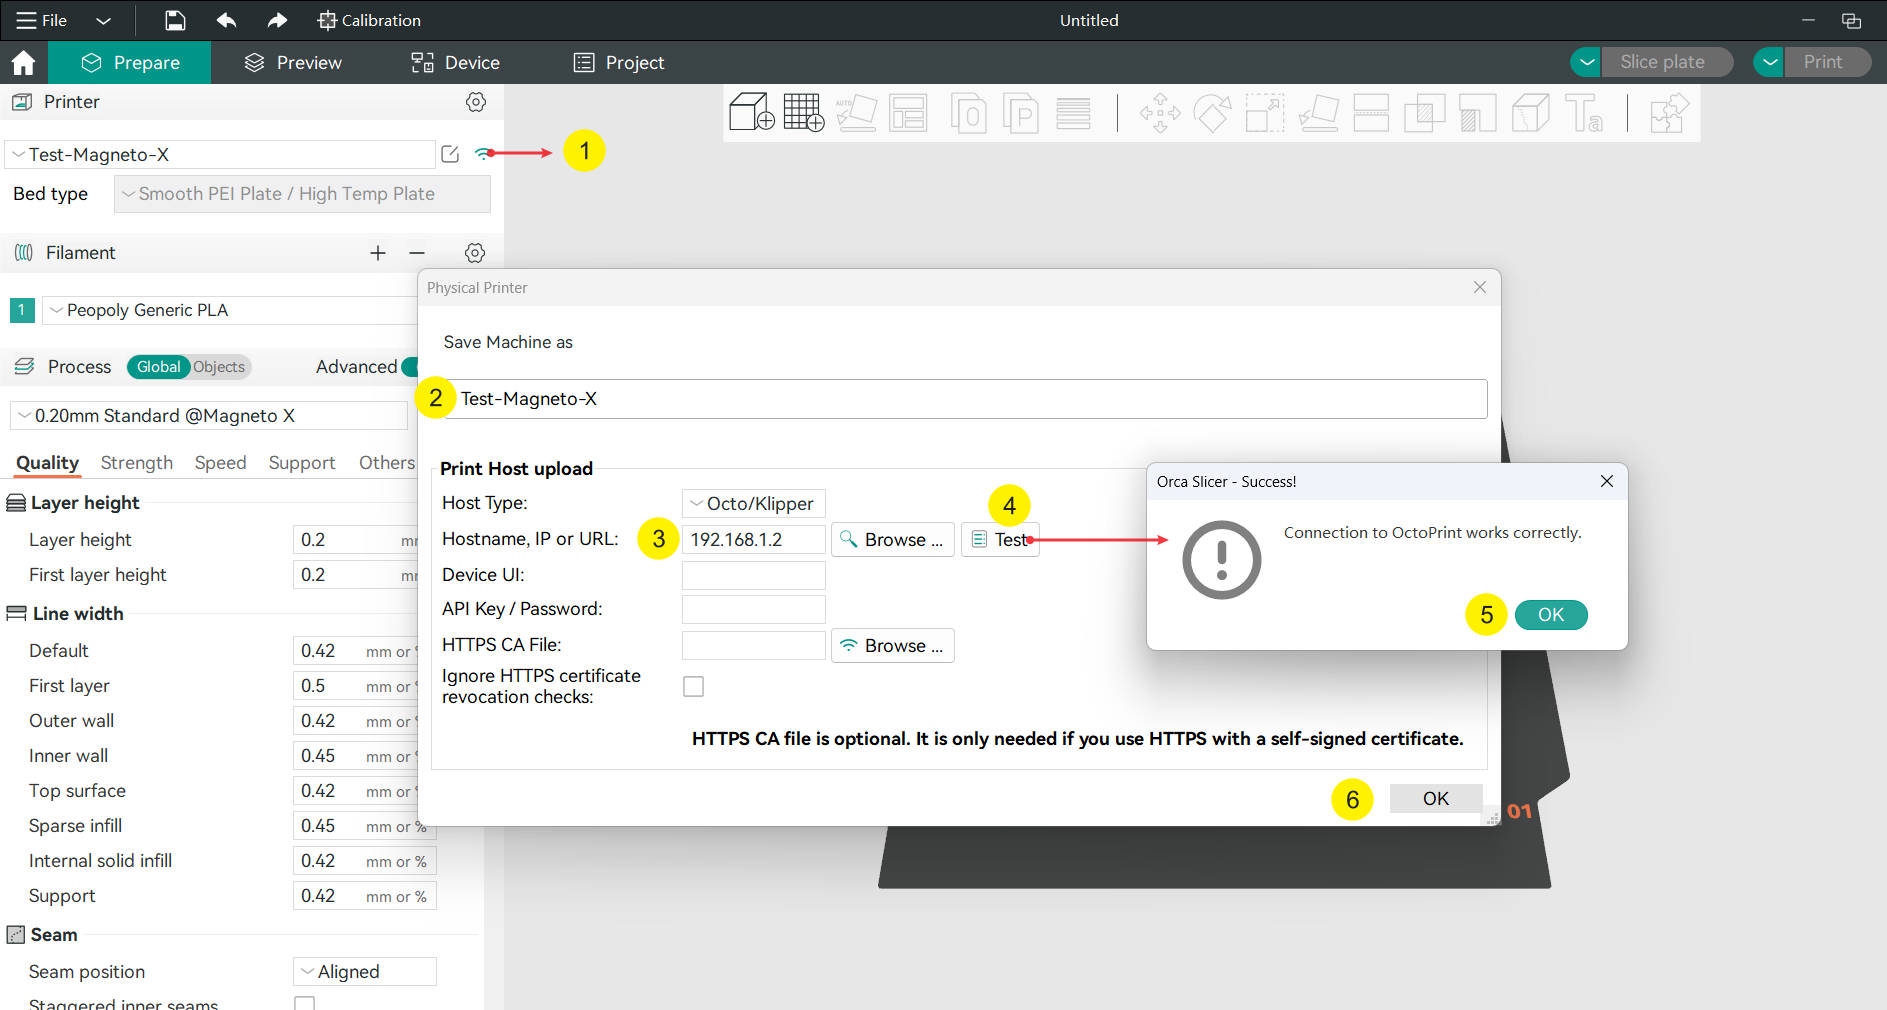
Network Connection: If your Magneto X is connected to your network via WiFi, Orca Slicer can often connect directly to it. Enter the IP address of your Magneto X in Orca's printer settings.
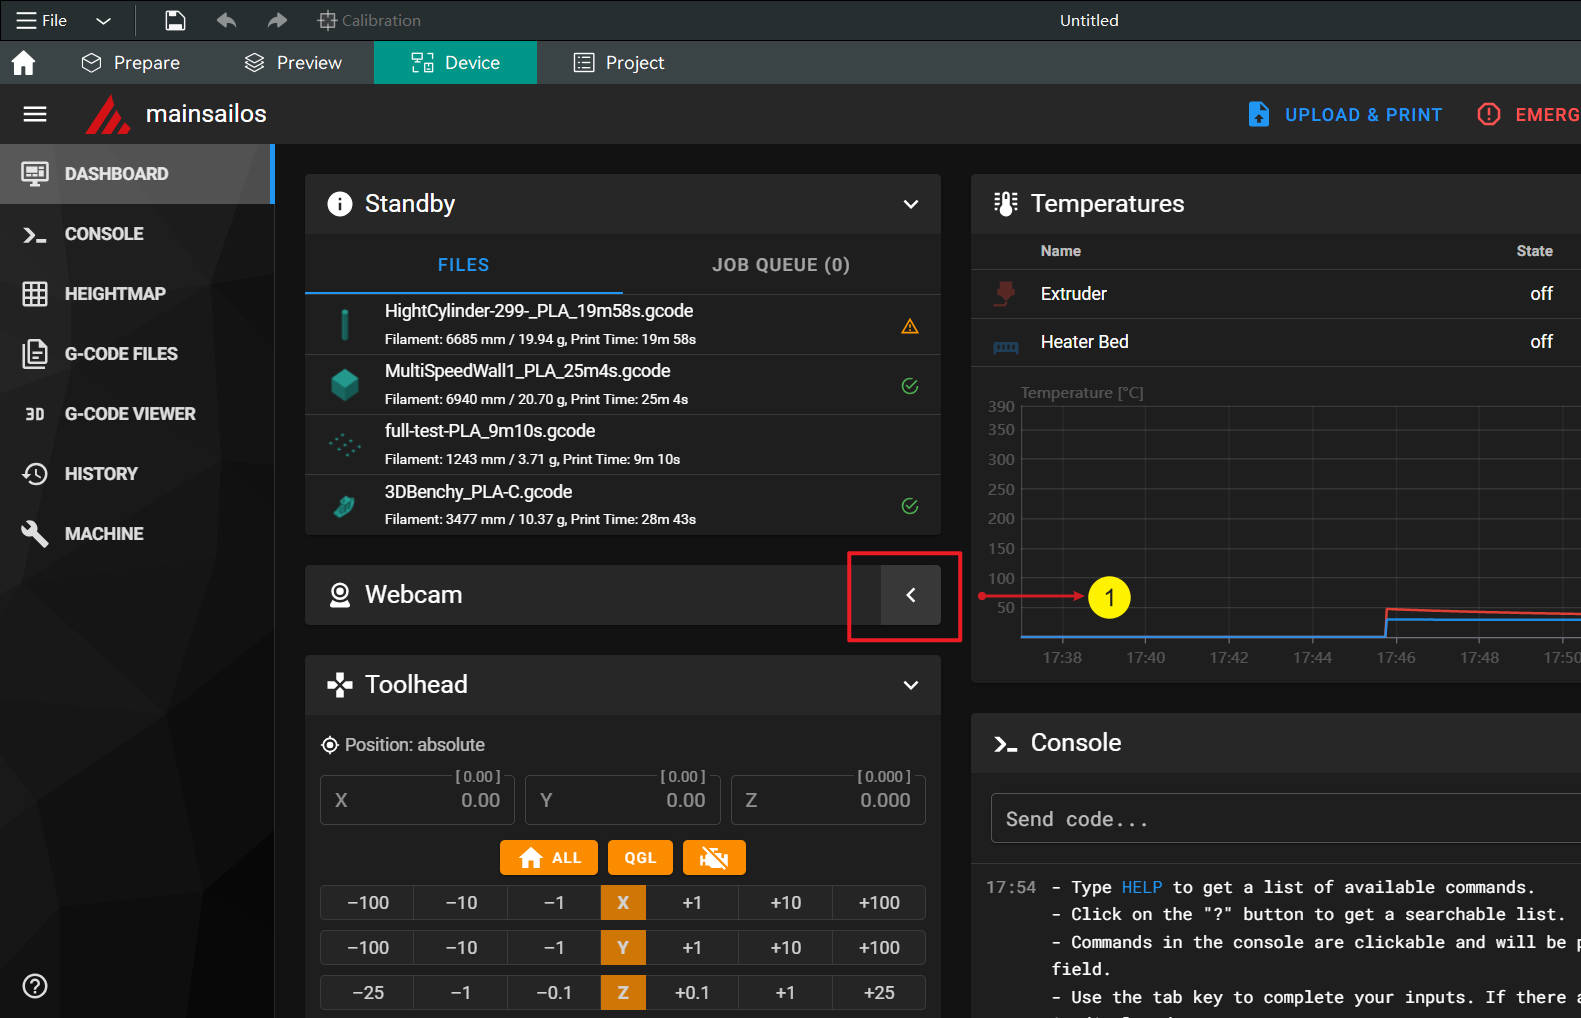
After the connection is successful, click "Device" to see the Magneto X control interface:

¶ 2. Slicing
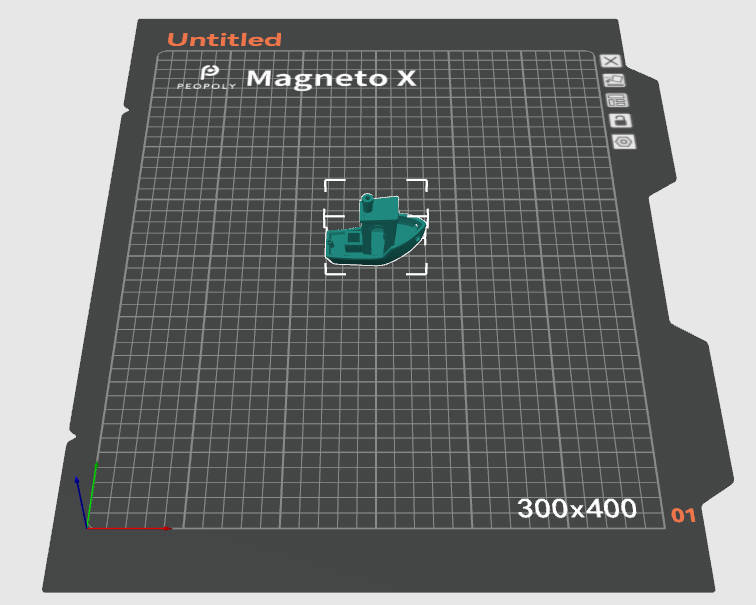
Select the stl/step/3mf file you need to print, drag it to the printing chassis position of the software, and import the model.
In the left column of OrcaSlicer, select the size of your printer's nozzle, the material to be printed, and parameters such as layer thickness and speed:
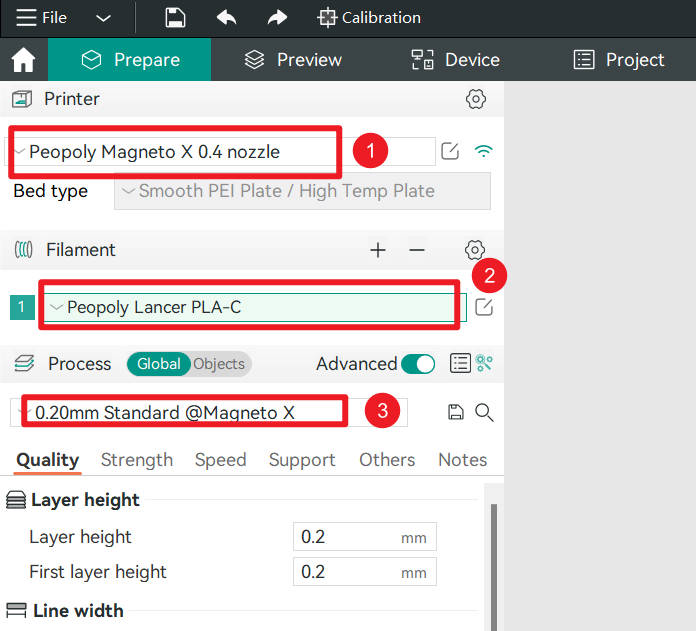
If the default Filament drop-down box does not contain the material you want to print, please refer to this link to set the slicing parameters of the specified filament.
Click the button shown in the figure below to slice the model:

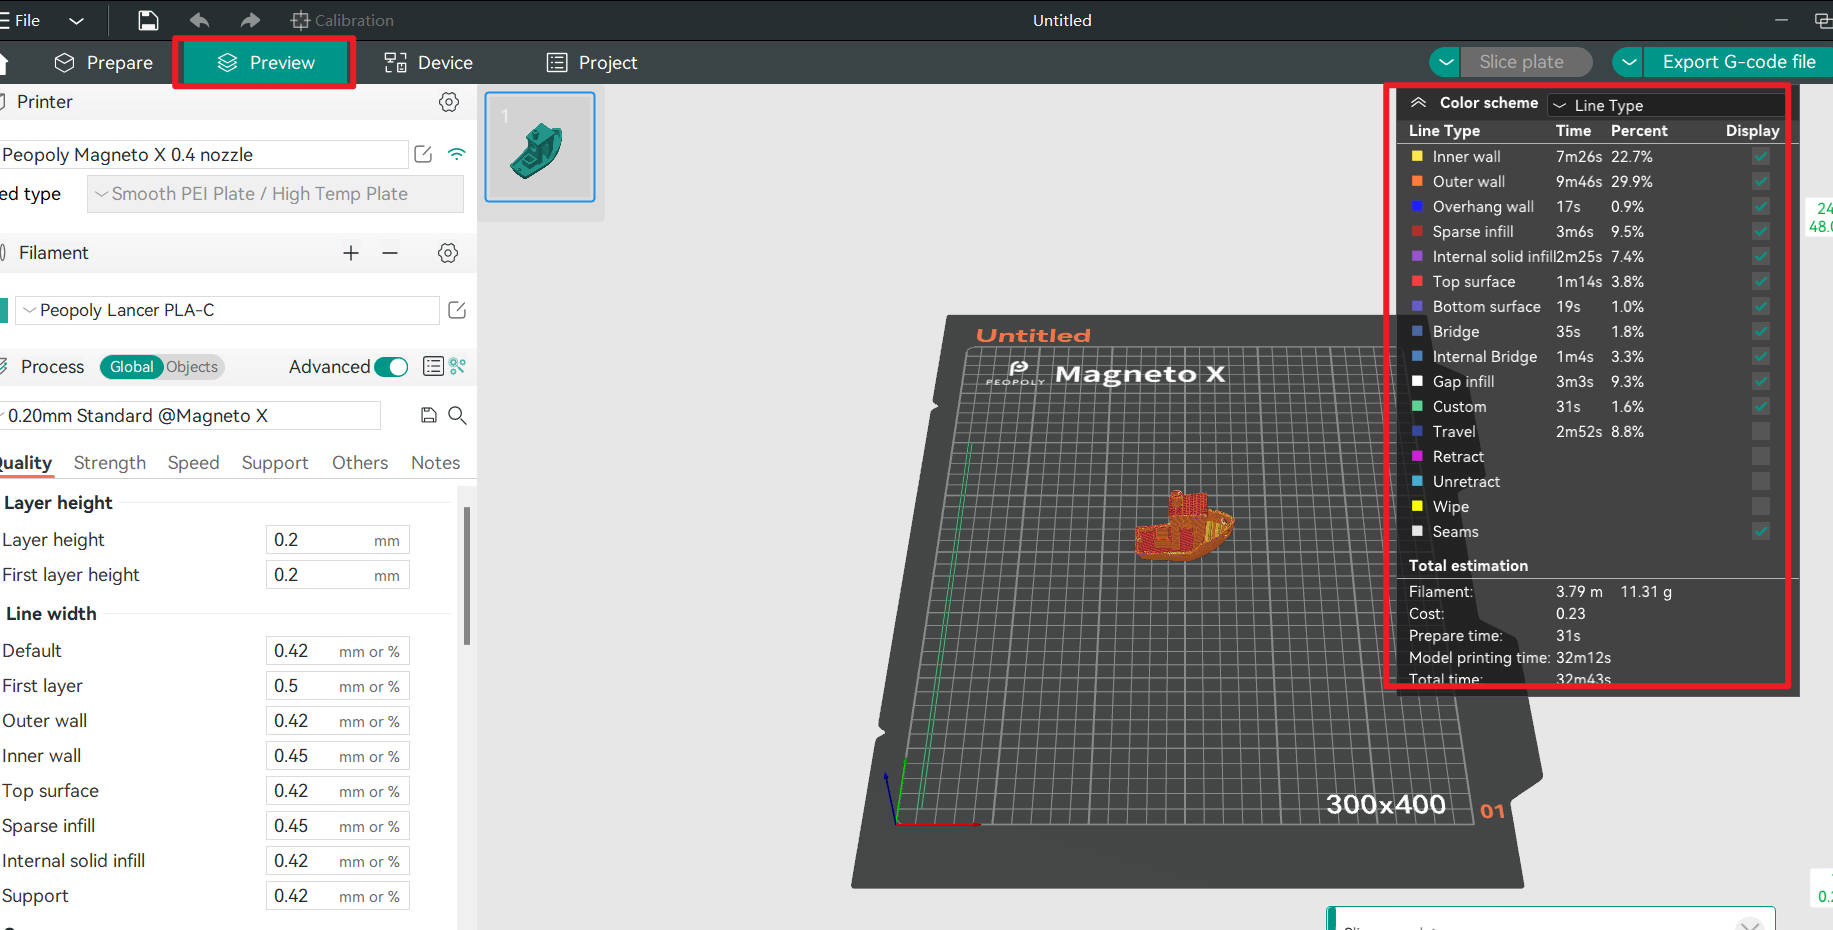
After slicing is completed, the interface will automatically enter the gcode preview interface. You can see a lot of information about gcode in this interface, including:
- Movement speed for each location on each floor
- Maximum flow value for each layer
- Line width at each location
- Total printing time
- Weight and length of printing filament consumed
¶ 3. Transfer gcode file
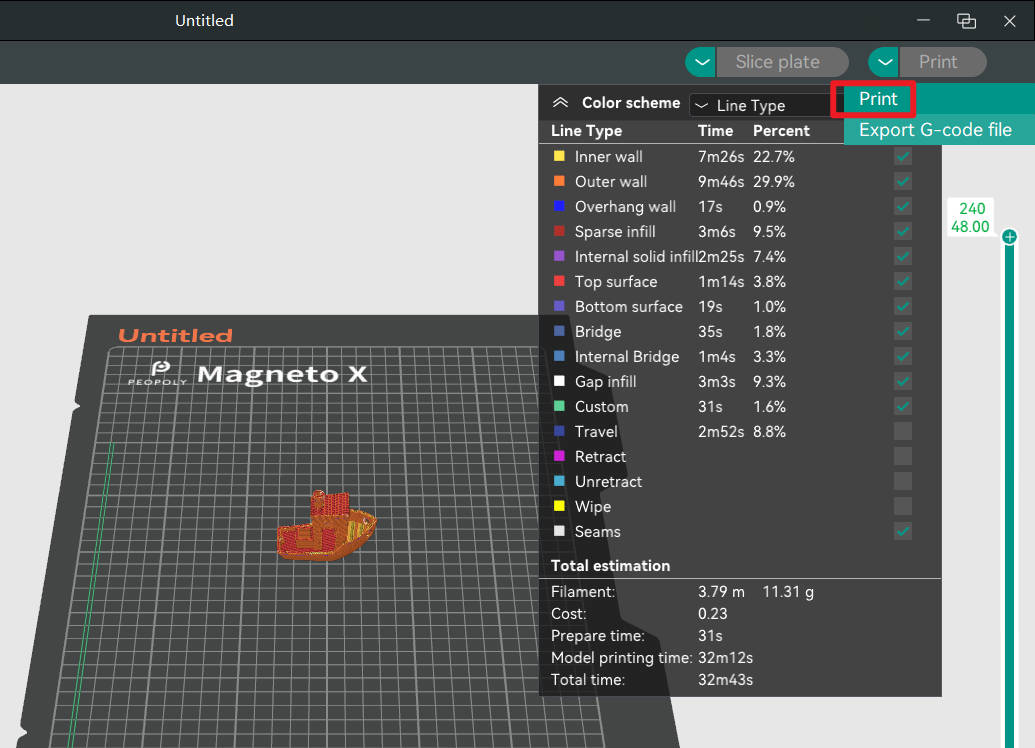
After slicing is completed, you can choose to export Gcode, or you can choose to send Gcode directly to Magneto X.
Click the Print button. If you have previously set OrcaSlicer to correctly connect to Magneto X, after clicking Print, a dialog box will pop up asking you to confirm whether to upload gcode to Magneto X.
